GIMP Tutorial Part Four
Add an image with a transparent background
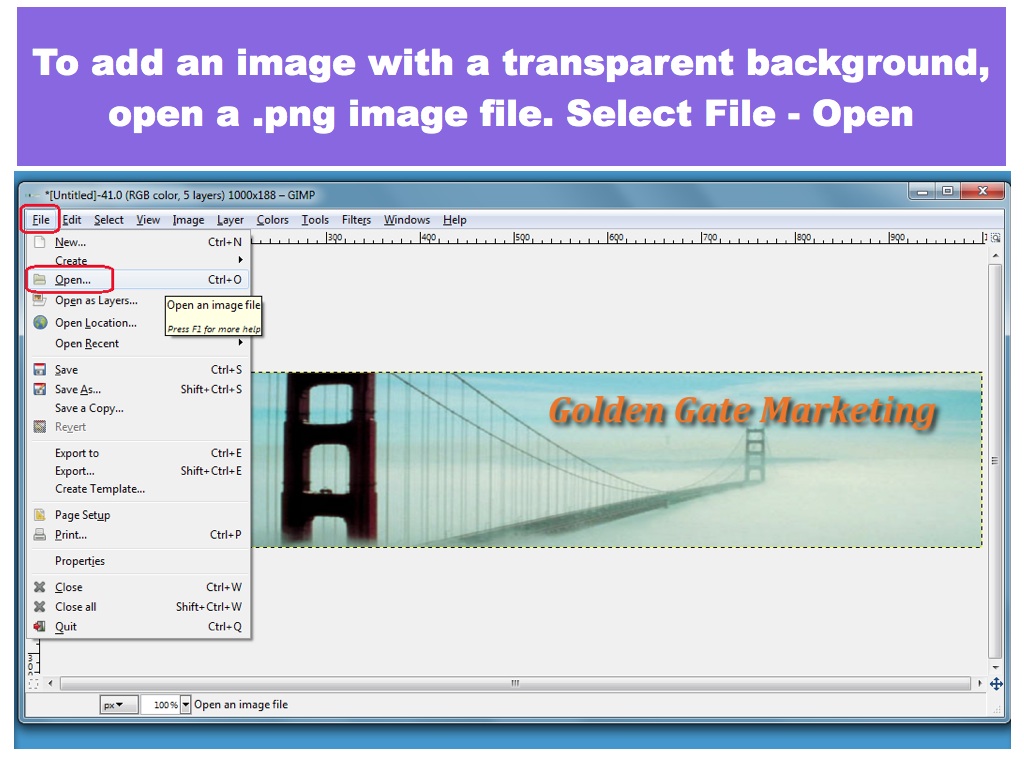
![Select File - Open Select File - Open](http://creativeanddigitalmarketing.designbysimon.com/wp-content/uploads/2012/10/GIMP-tutorial.025.jpg)
Select File – Open
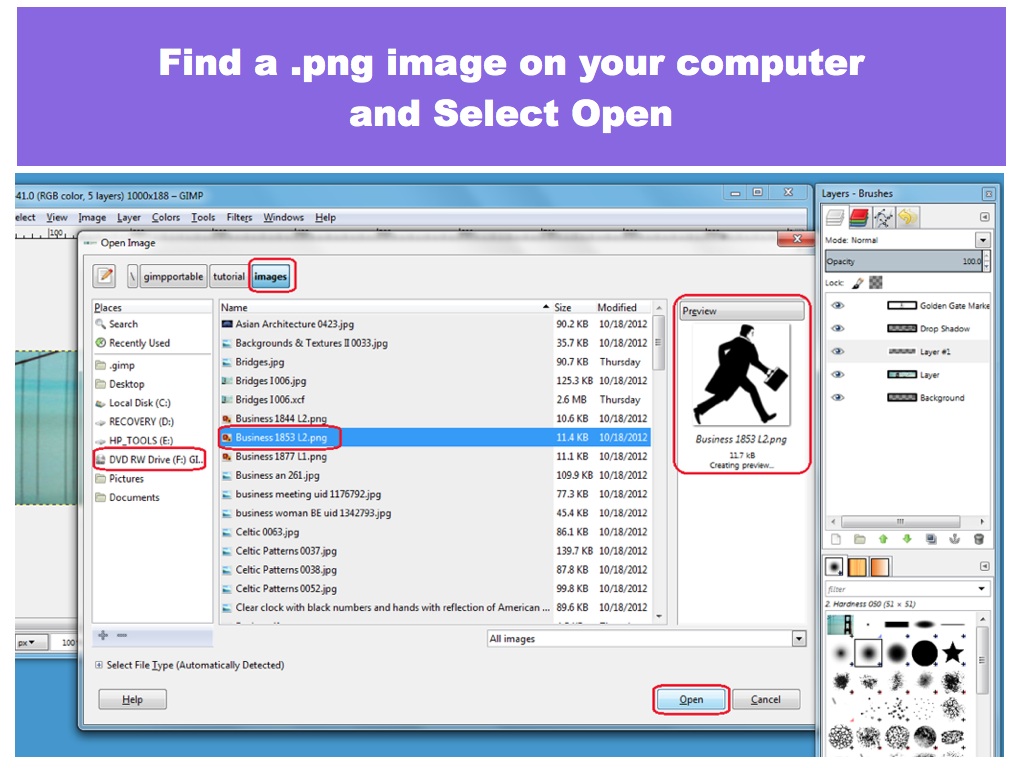
![Open a .png image file Open a .png image file](http://creativeanddigitalmarketing.designbysimon.com/wp-content/uploads/2012/10/GIMP-tutorial.026.jpg)
Open a .png image file
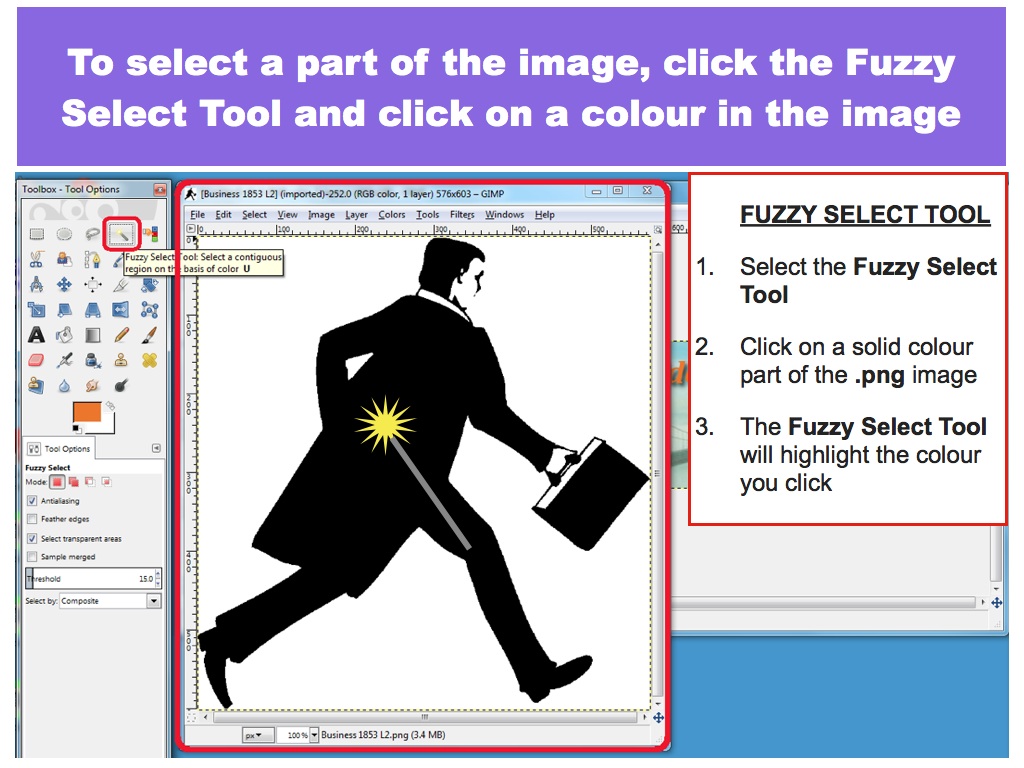
![Choose the Fuzzy Select Tool Choose the Fuzzy Select Tool](http://creativeanddigitalmarketing.designbysimon.com/wp-content/uploads/2012/10/GIMP-tutorial.027.jpg)
Choose the Fuzzy Select Tool
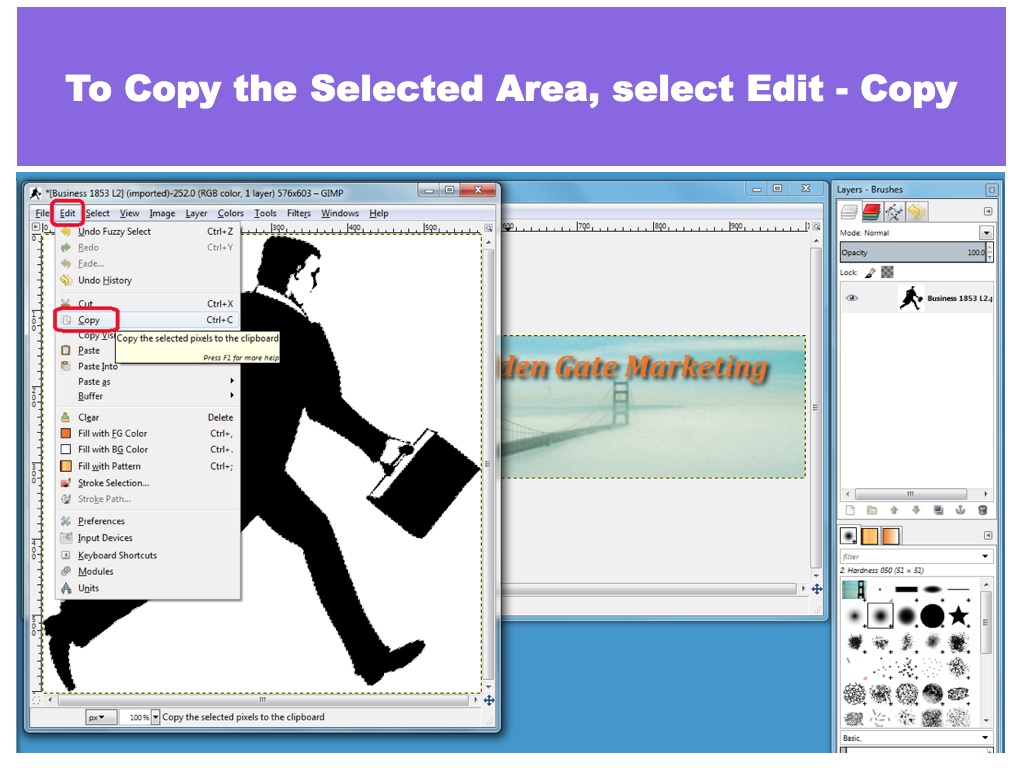
![Select Edit - Copy Select Edit - Copy](http://creativeanddigitalmarketing.designbysimon.com/wp-content/uploads/2012/10/GIMP-tutorial.028.jpg)
Select Edit – Copy
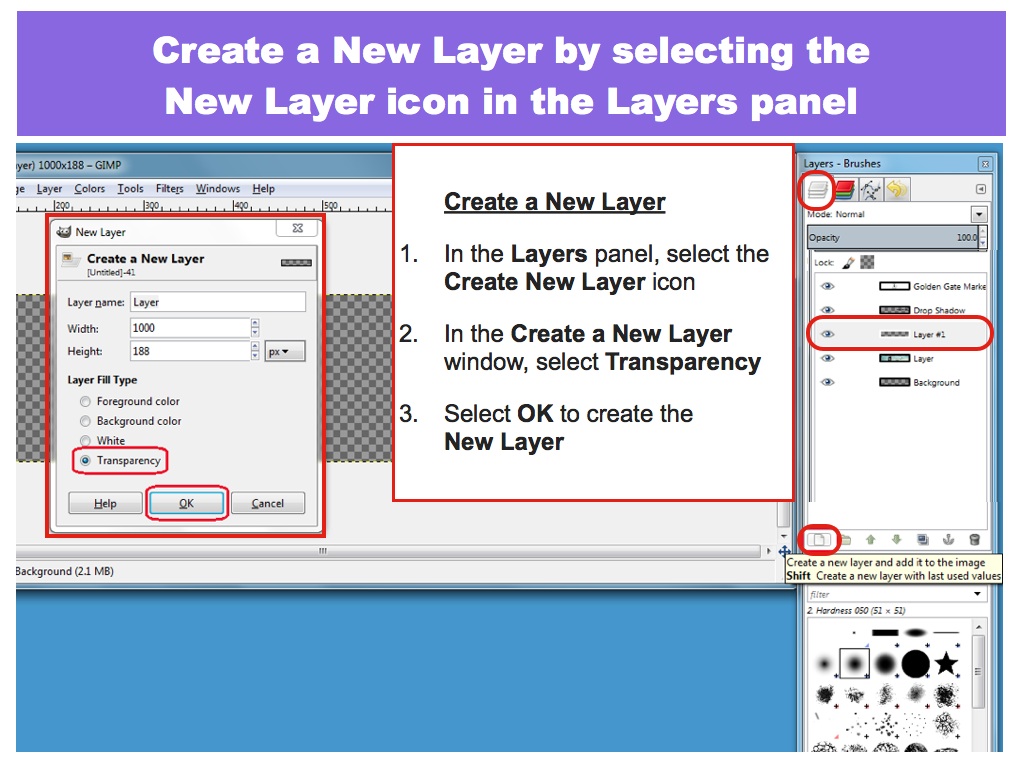
![Create a New Layer in your WordPress Header Image Create a New Layer in your WordPress Header Image](http://creativeanddigitalmarketing.designbysimon.com/wp-content/uploads/2012/10/GIMP-tutorial.029.jpg)
Create a New Layer in your WordPress Header Image
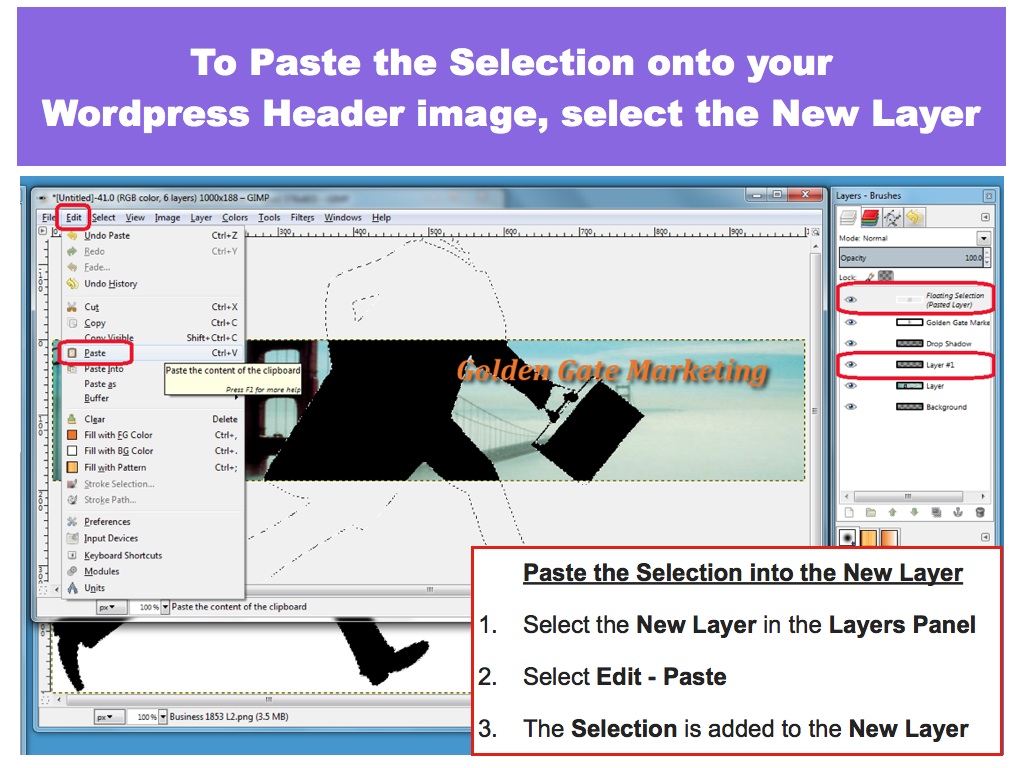
![Select the New Layer, select Edit - Paste Select the New Layer, select Edit - Paste](http://creativeanddigitalmarketing.designbysimon.com/wp-content/uploads/2012/10/GIMP-tutorial.030.jpg)
Select the New Layer, select Edit – Paste
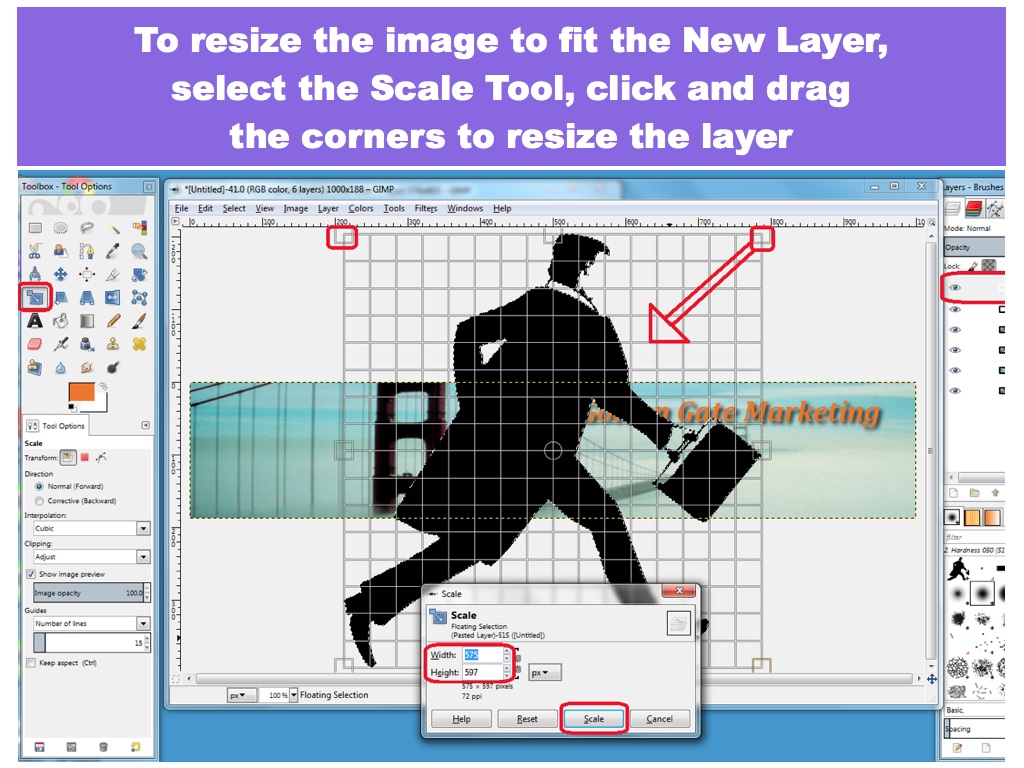
![Select Scale to resize Select Scale to resize](http://creativeanddigitalmarketing.designbysimon.com/wp-content/uploads/2012/10/GIMP-tutorial.031.jpg)
Select Scale to resize
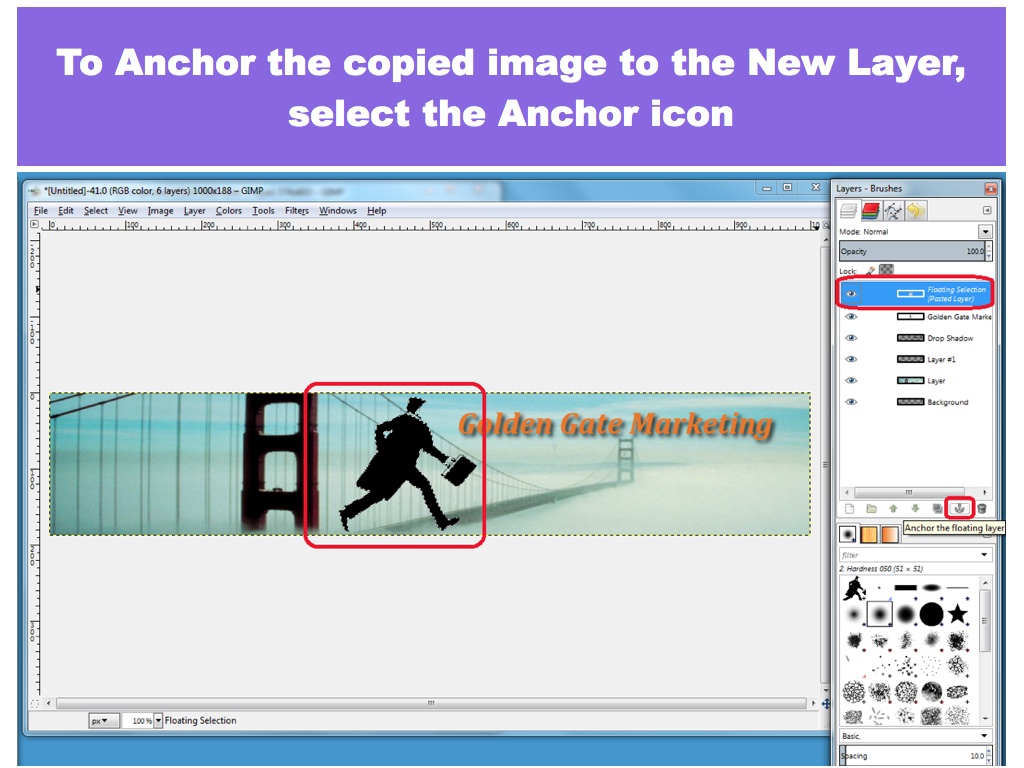
![Anchor the Floating Section Anchor the Floating Section](http://creativeanddigitalmarketing.designbysimon.com/wp-content/uploads/2012/10/GIMP-tutorial.032.jpg)
Anchor the Floating Section