GIMP Tutorial
Download GIMP Tutorial .pdf file here
Create a New WordPress Header Image Part One
![Double click the GIMP icon to launch the program Double click the GIMP icon to launch the program](http://creativeanddigitalmarketing.designbysimon.com/wp-content/uploads/2012/10/GIMP-tutorial.001.jpg)
Double click the GIMP icon to launch the program
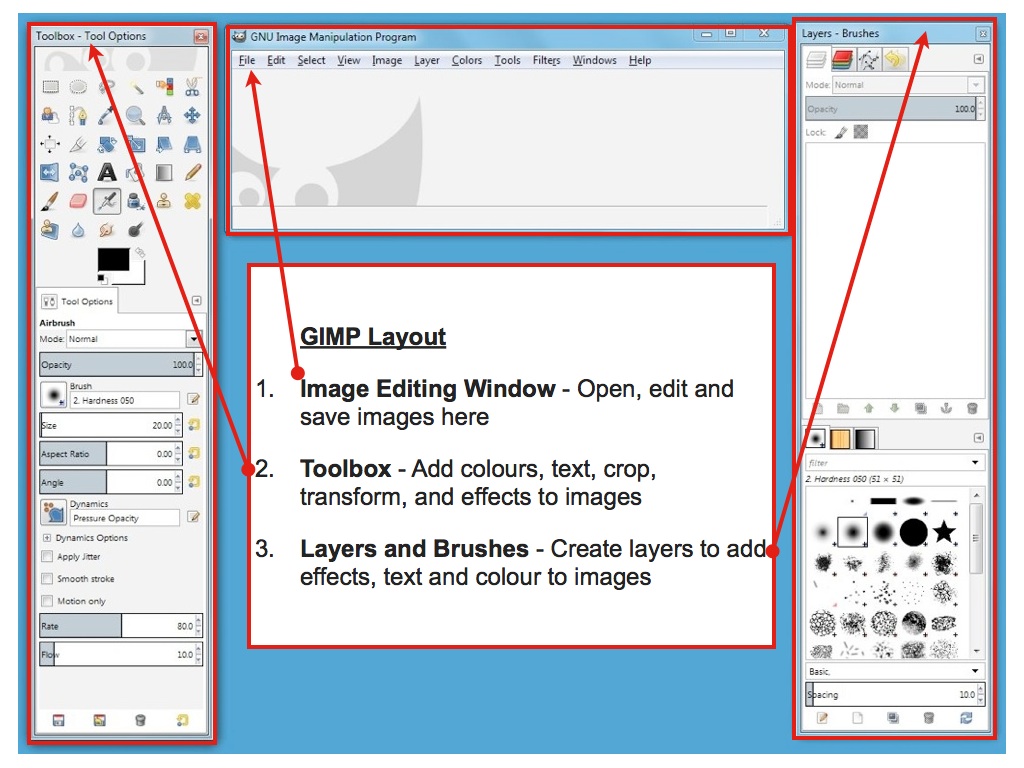
![GIMP Layout GIMP Layout](http://creativeanddigitalmarketing.designbysimon.com/wp-content/uploads/2012/10/GIMP-tutorial.002.jpg)
GIMP Layout
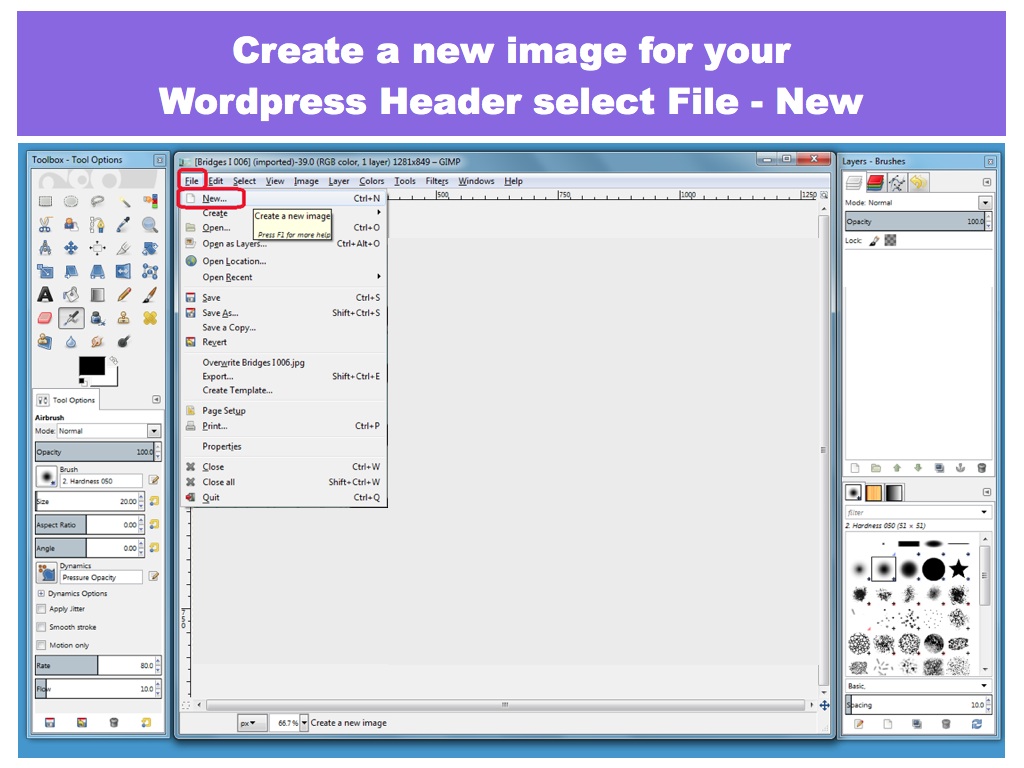
![Select File - New Select File - New](http://creativeanddigitalmarketing.designbysimon.com/wp-content/uploads/2012/10/GIMP-tutorial.003.jpg)
Select File – New
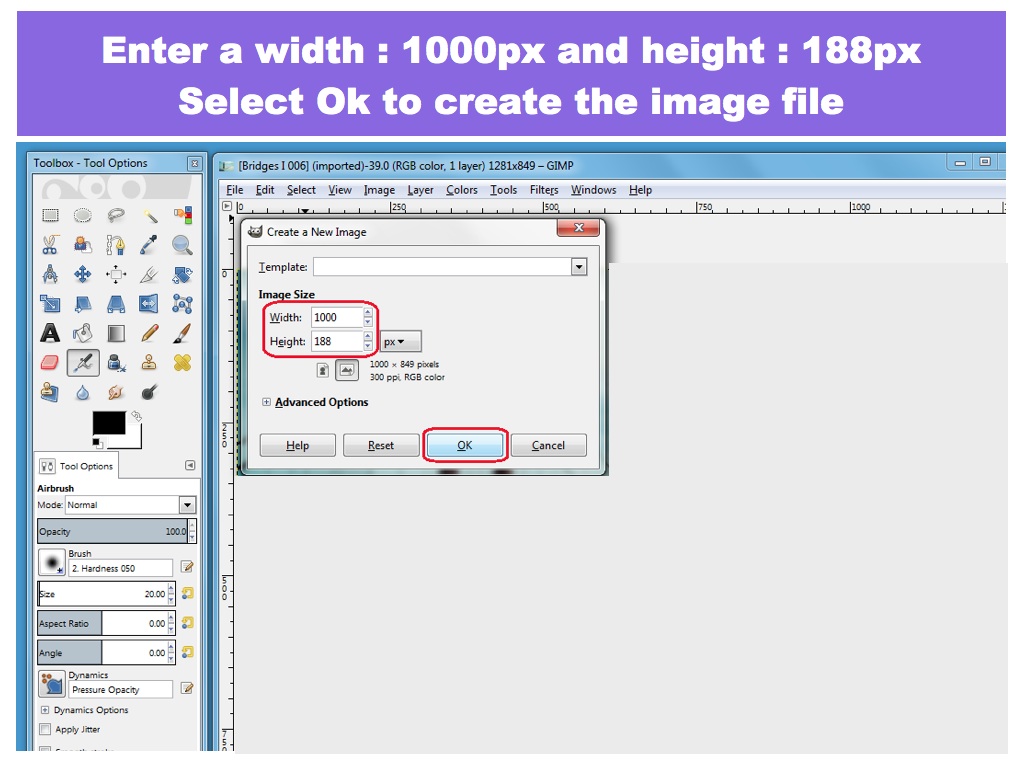
![Enter a width and height Enter a width and height](http://creativeanddigitalmarketing.designbysimon.com/wp-content/uploads/2012/10/GIMP-tutorial.004.jpg)
Enter a width and height
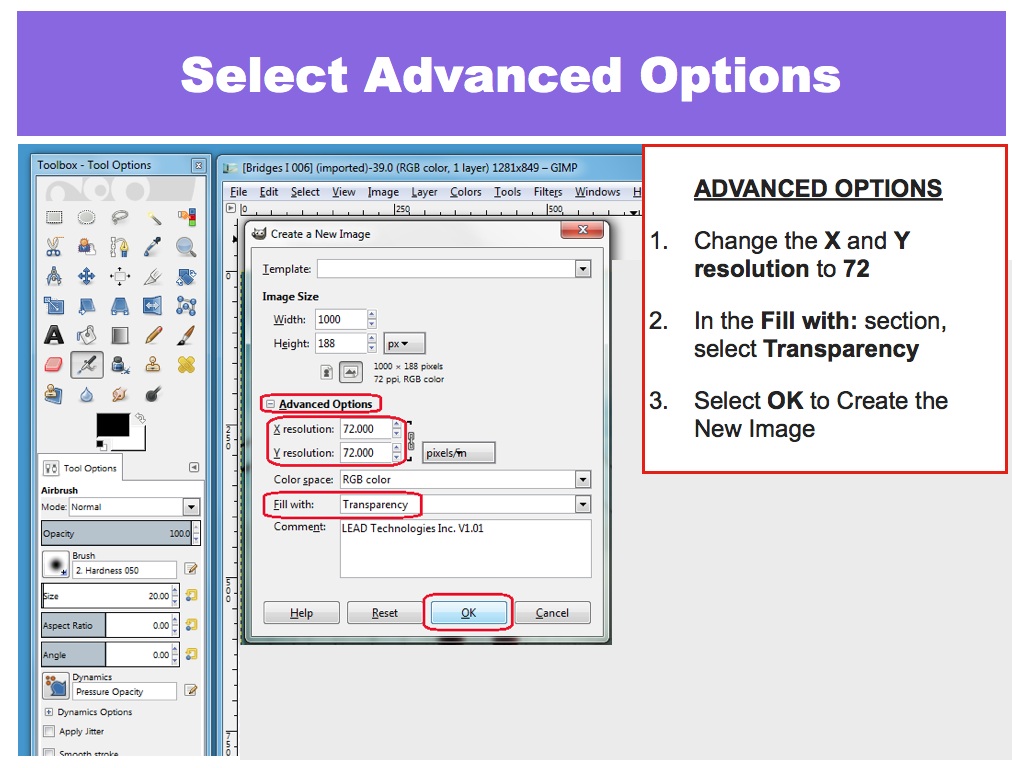
![Select Advanced Options Select Advanced Options](http://creativeanddigitalmarketing.designbysimon.com/wp-content/uploads/2012/10/GIMP-tutorial.005.jpg)
Select Advanced Options
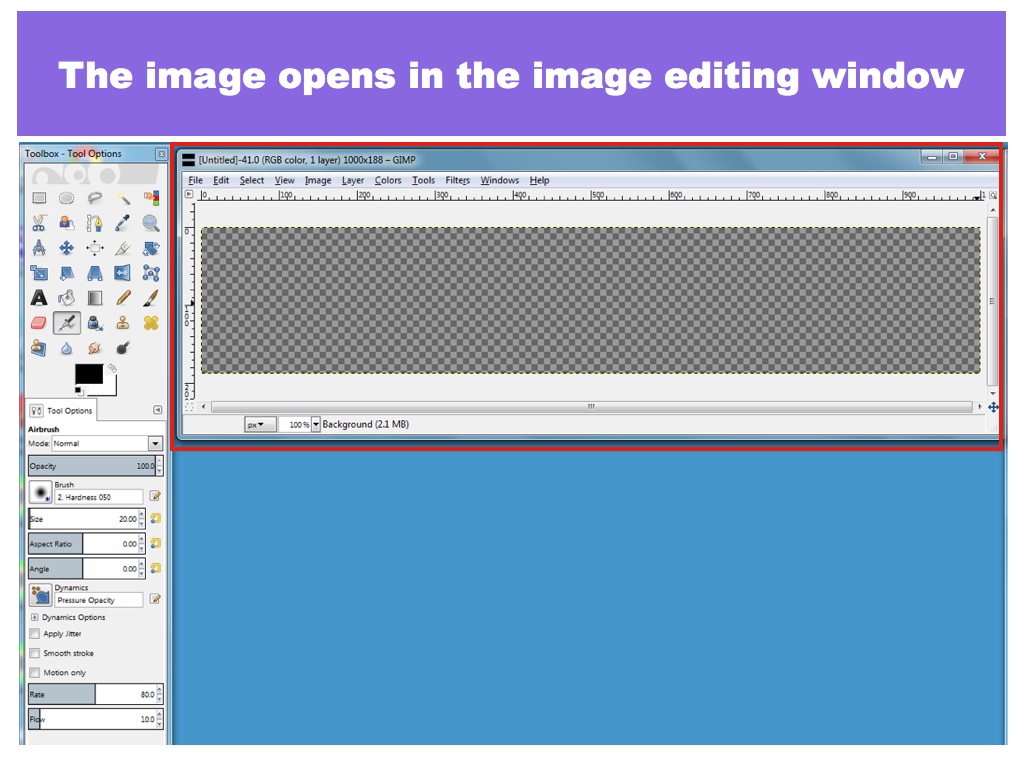
![New Image opens New Image opens](http://creativeanddigitalmarketing.designbysimon.com/wp-content/uploads/2012/10/GIMP-tutorial.006.jpg)
New Image opens
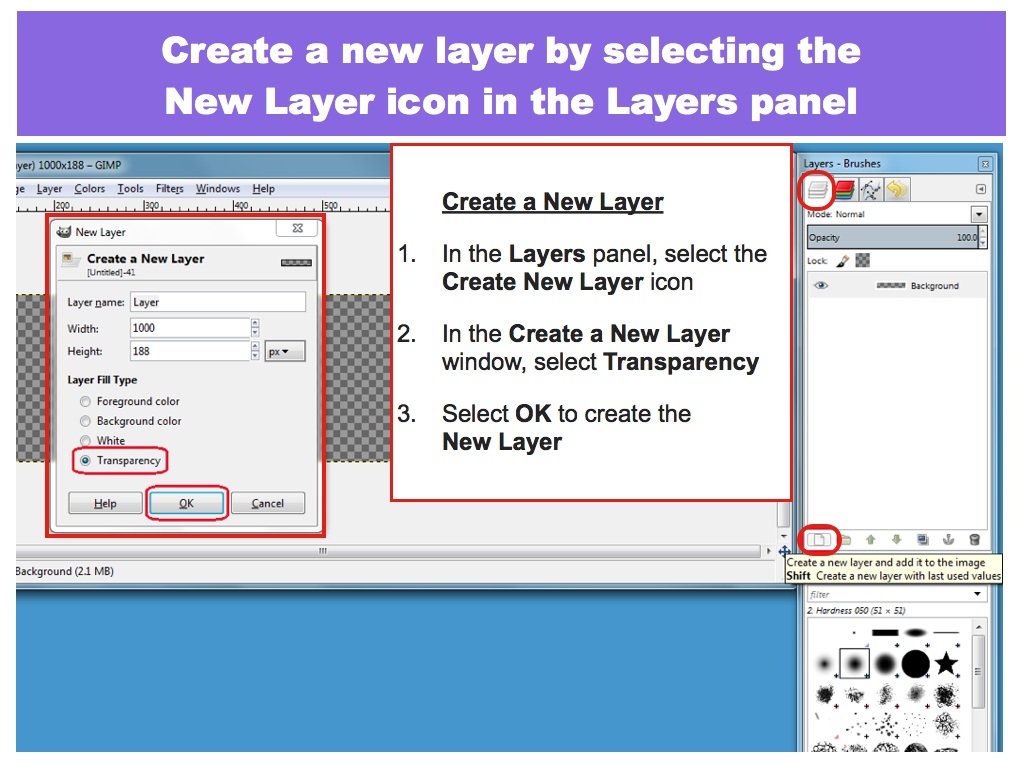
![Create a new layer Create a new layer](http://creativeanddigitalmarketing.designbysimon.com/wp-content/uploads/2012/10/GIMP-tutorial.007.jpg)
Create a new layer
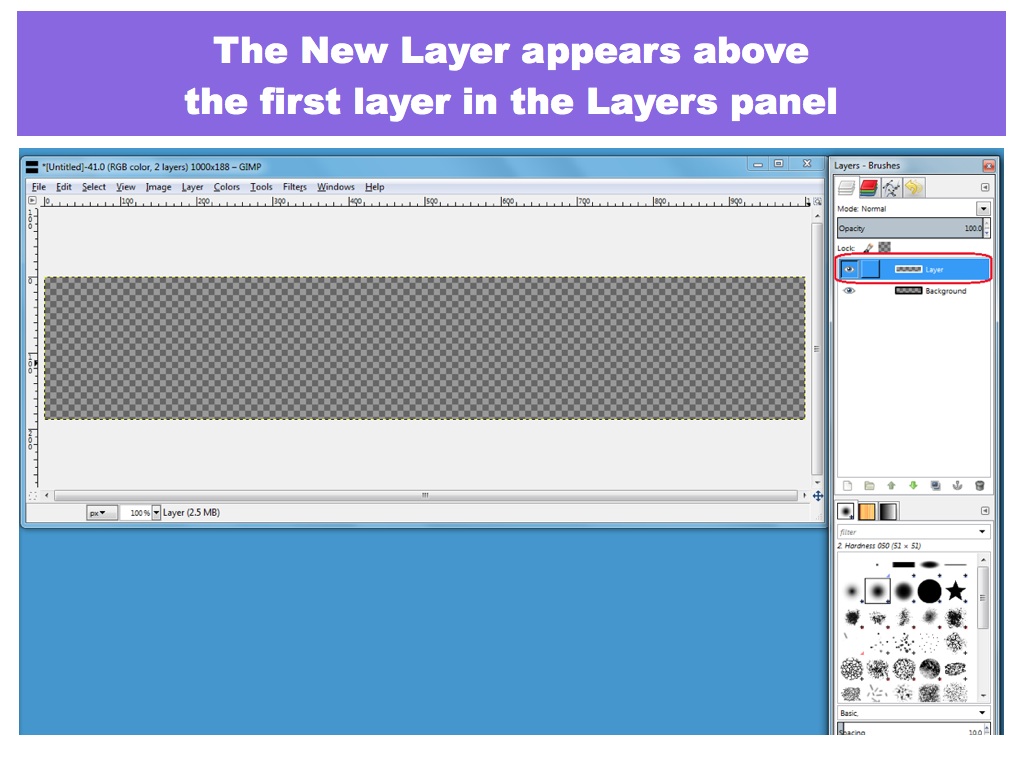
![New Layer appears above First Layer New Layer appears above First Layer](http://creativeanddigitalmarketing.designbysimon.com/wp-content/uploads/2012/10/GIMP-tutorial.008.jpg)
New Layer appears above First Layer